Forwarding from the Outlook app for Windows
Step 1: Select the “start” tab in the menu bar and click on the “rules” button.
Step 2: Select the option “manage rules and alerts” from the “rules” menu.
Outlook will open the “rules and alerts” dialogue box with the “e-mail rules” and “manage notifications” tabs.
Step 3: Select the “e-mail rules” tab, and click the “new rule” button to open the rule wizard.
Step 4: The rules wizard allows you to access rule templates or create your own. For e-mail forwarding, select the option “apply rule on messages I receive” in “start from a blank rule.”

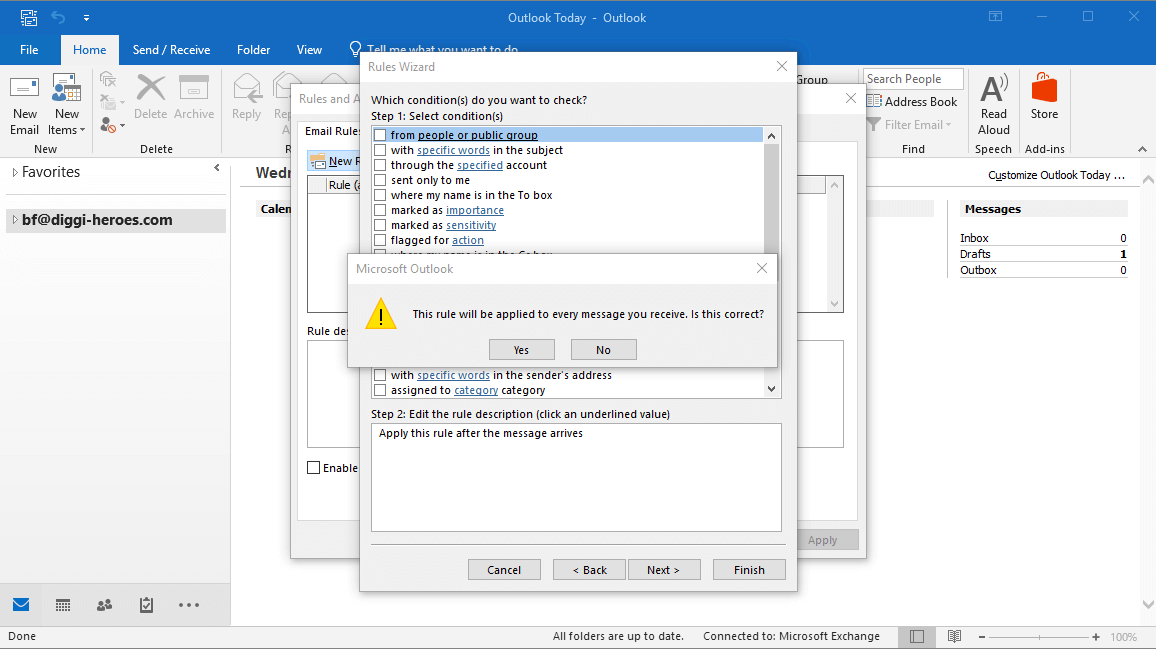
Step 5: First decide which messages the rule applies to by selecting one or more of the options offered, and replacing the words underlined in blue with individual values. If you do not want to select a condition, skip this point by clicking on “next.” If you do this, the rule will apply to all incoming messages.

If you want to link your inbox rule to a condition, set a check mark in the respective box and click on the blue underlined word to enter the value (for example, a sender).

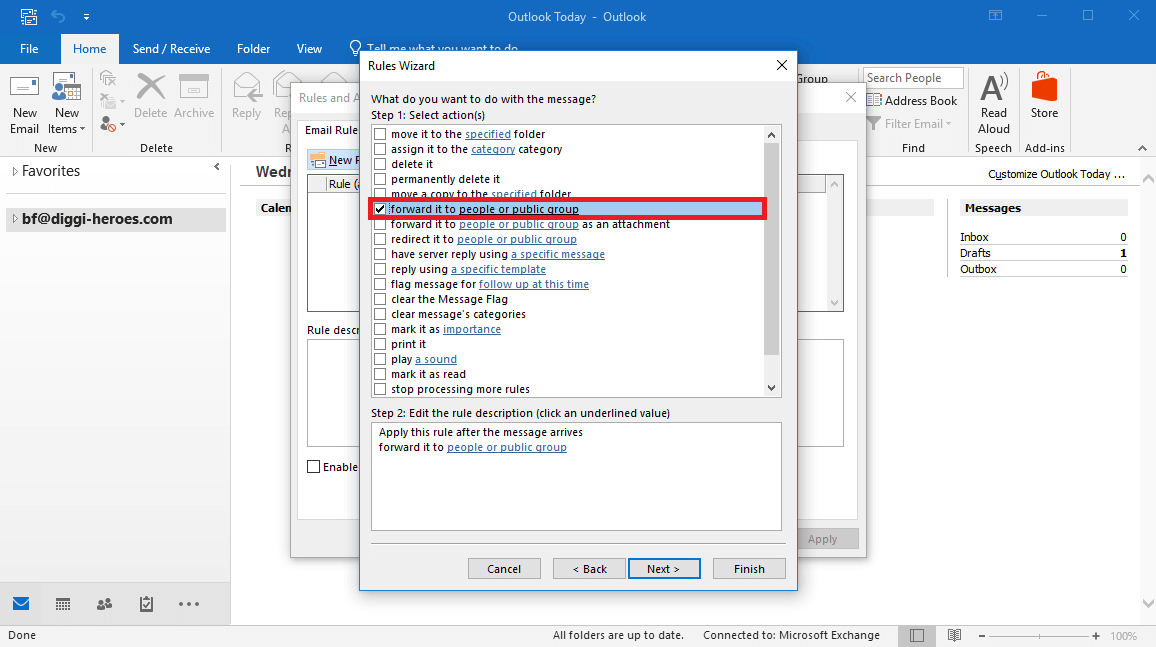
Step 6: Then select an action to apply to all messages that meet the previously selected condition. For easy forwarding, select the “forward to a person/public group” option. If you want to set up a redirect instead, select “redirect to a person/public group.”

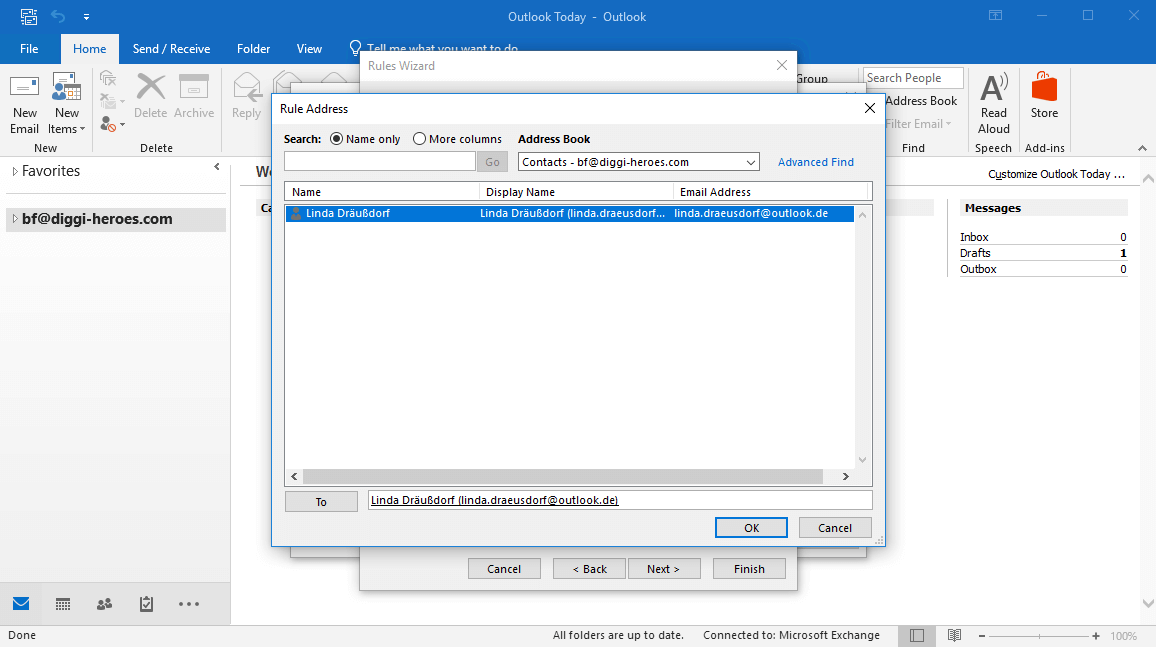
Step 7: Specify a person or group to which incoming messages should be forwarded. Click on the word with a blue background, and select a person or group of recipients from your address book.

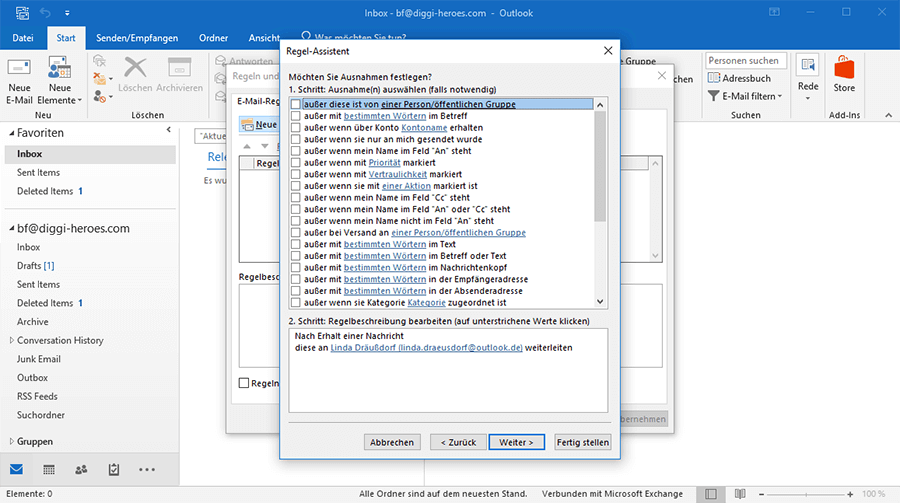
Step 8: If necessary, select exceptions for the inbox rule.

Step 9: Name the rule you configured and specify whether the rule is to apply only to new incoming messages or to all e-mails already saved in the inbox. Complete the configuration process by clicking on “finish.”
The newly created rule is displayed in the “rules and alerts” dialogue box.


